
We’ve all had that gown that we love but made before we knew better. My gown was originally made from block-printed, India cotton in a center-front closing style with a separate bodice and high neckline in back and a low neckline in front, as seen in Janet Arnold’s Patterns of Fashion 1, Englishwomen’s Dresses and Their Construction, 1660-1860. The gown in the book is dated 1775-1785, but the general consensus now is that this is a high-fashion style, typically done in silk, possibly with self-fabric trim, and probably would not have been made in this type of fabric and likely would not have had a separate, seamed bodice back.

Based upon information in Sharon Burnston’s Fitting and Proper suggesting that the center-front closing style was popular later than the 1770s and that many stomacher-front gowns were altered to the later center-front closing style, I decided to alter this gown in reverse. Problem #1 was that the bodice was separate from the skirts, and I was racking my brain to figure out how, without another large panel of left-over fabric, to put the gown back to the one-piece back style. When a friend said to me “it really can’t be done,” I remained undeterred. Having seen a gown in the collection of the Newport (RI) Historical Society that was completely pieced, I decided that was the solution. I cut down the back of the neckline, cut off the point at the bottom of the bodice, pieced and pleated the back upper bodice, pieced that onto a longer piece for the middle back of the skirt and re-pleated the back in the correct manner. The piecing is visible upon close inspection. Yet from a distance, when wearing with an apron over it, it is much less noticeable, especially after it is steam pressed

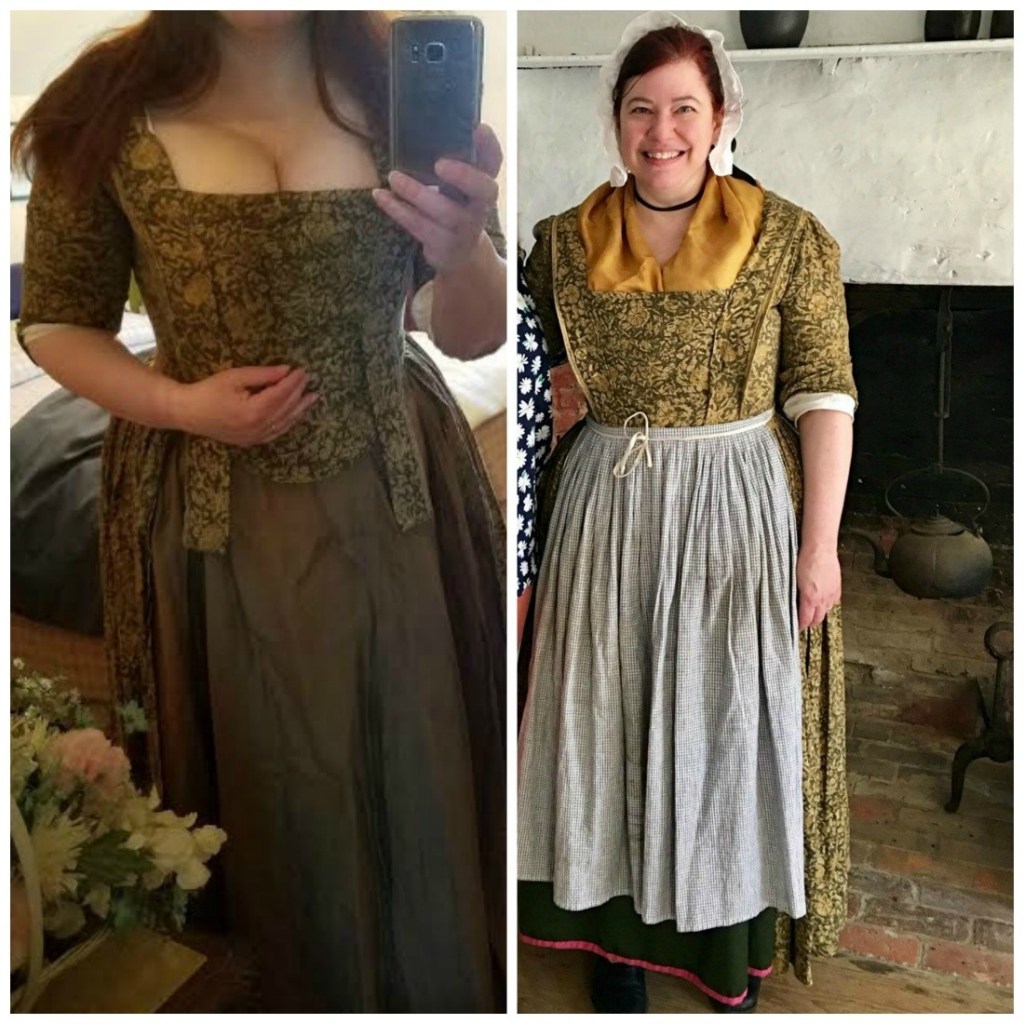
For the front, I initially considered cutting the fronts away, using those pieces to create a stomacher and adding robings.* But what if I had an event set for a later date, and I still wanted to wear it as a center-front closing gown? I had a couple of nearly long-enough pieces I could fold to use as robings, which I pieced near the shoulders to make longer, but otherwise had only limited scraps of fabric. I decided that it would look fine to have a pieced stomacher that I could pin over the center-front closure, so I arranged and pinned the scraps onto my stomacher template to ensure that there would be enough. Again, the piecing is visible if looking closely but once steam pressed it is barely noticeable. I chose to baste the robings to the shoulder strap rather than attaching them all the way down, pinned the stomacher and robings over the closed center front, and presto, I had a convertible gown with removable robings that I could wear either way. I also reset the sleeves to adjust the seam allowances, because they always seemed just a little too short.
The next issue was with two large borders at the bottom of the skirt. When I made the gown, the bedspread fabric had a double border. Since I did not know yet that gown skirts typically did not have borders, I simply incorporated it. When I cut those off, naturally it made the skirt much too short, even for a “work gown.” To fix it, I had to piece the bottom using multiple small scraps. Fortunately, I also had enough fabric scraps left to piece together some cuffs. Overall, I was pleased with the result. Remember, piecing IS period!
*Robings are the strips of fabric that start at the shoulder strap and run down the front of a gown on either side of the stomacher. Robings might have ruched or box-pleated trim applied to them and extended around the neckline.

Kristel Henry learned 18th-century construction techniques from Larkin & Smith. She is a member of several living history groups in New England and has volunteered with the NPS and at museums in RI and CT. She holds a BA in English Literature from Rhode Island College and is currently employed by Old York Historical Society as a historical interpreter.
